


We can finally see the light at the end of the renovation tunnel. Granted, it’s still a tad dim, but there’s definitely a hopeful glimmer. Tile work has started in the bathrooms, interior painting is close to complete, floor refinishing began today, concrete for driveway & breezeway begins next week, followed by kitchen & bath cabinet installation. Newly crafted front & gallery doors will be installed after that. Woohoo! Sounds like we’re moving in before the end of the year!
A long, hot summer seemed even longer with reno work at a snail’s pace through August. I won’t bore you with all the work delays. Let’s just say there were many. As a friend said to me in early July, “It always costs twice as much and takes twice as long as you think.” Yep. Sure does.

The good news, however, is that everyone took great pride in their work and has done a quality job on their individual tasks. At the end of the day, this is what will really matter – not the sensation that we stood still and watched paint dry all summer.
You never know what you might encounter when you start tearing away at a 143 year old house. Luckily, we’ve encountered very few ugly surprises along the way. Just one giant scary one. The first and second story galleries looked like they would need some work… UNDERSTATEMENT. Forget what’s rotten in Denmark, the floors, ceilings and columns of these porches were nothing but rot.

The galleries – “before” 
Rotted gallery ceiling 
Rotted gallery column 
Rotted gallery floor 
The former galleries…

Fortunately, we had applied for and were granted a Preservation & Community Enhancement Grant (P.A.C.E.) through the City of Madison’s Office of Historic Preservation. Our application focused on two projects visible from the street – three new period doors to be custom-made by Welch Millwork & Design (along with refurbishing the accompanying glass transoms), and the “shoring up” of the galleries’ structures by our trimwork team on site. The door and transom work has gone swimmingly, but the galleries had to be completely demolished and rebuilt with appropriate materials to look and function like the originals. Again I say, SCARY.
That said, it turned out to be best case scenario. The trim team had great vision & skill and fashioned gorgeous gallery replacements while seemingly dangling from the side of the building. I know these guys are used to hoisting and balancing, but it looked like Cirque du Soleil to me. I guess that’s why they do what they do, and I stay on the ground. Here is an assortment of photos from the build.

Gallery rebuilding begins… 
A view from above 
Buidling the new lower ceiling 
The new upper ceiling 
Painted new upper floor 
Finishing the trim 
Galleries completely rebuilt – waiting for spindle paint
We really have made great progress this last year. “Slow and steady wins the race.” Ken & I should have t-shirts with that on them. We have “felt” every day of the process, but when we look at “before & after” photos of the project so far, the transformation is quite amazing. I cannot wait to see the REAL “after” photos. Enjoy these pics of the progress journey and stay tuned for The Grand Finale!
Living Room Transformation to Date

Fireplace wall “before” 
Wallpaper stripped; insulation staging area 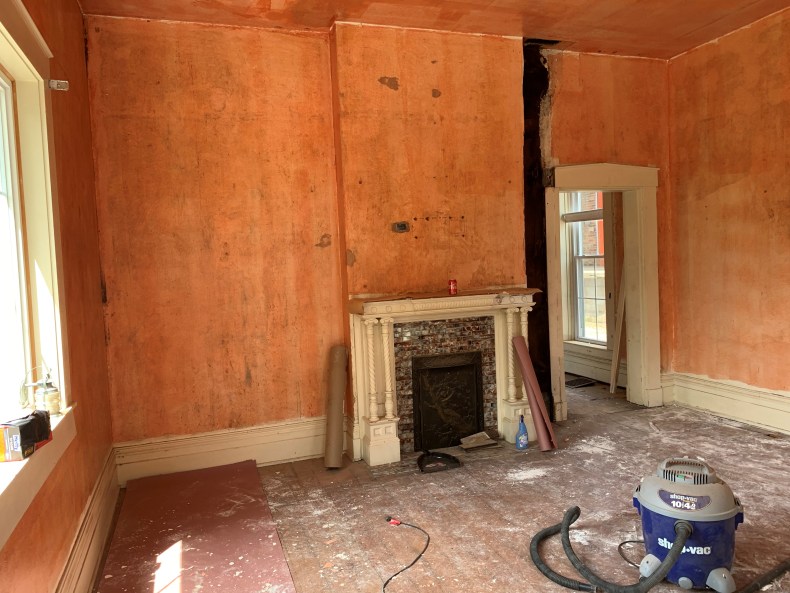
Walls prepped with bonding agent 
Finish paint – awaiting floor refinishing
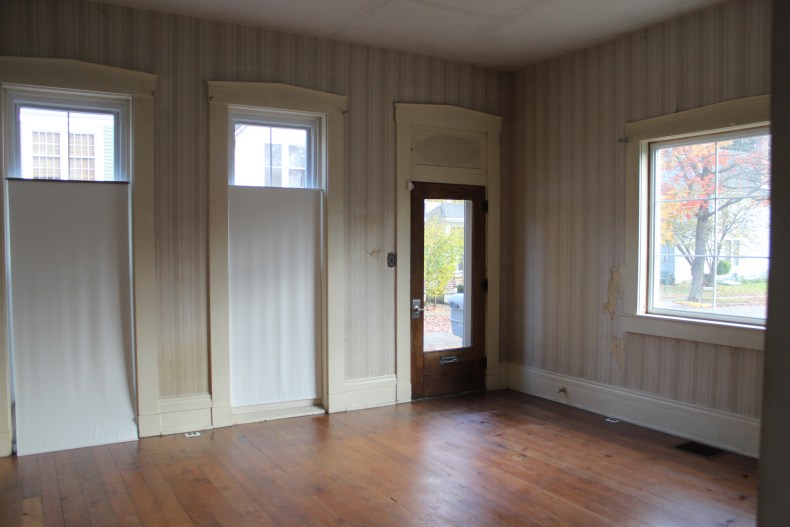
Front door wall “before 
Finish paint – awating new door & transom
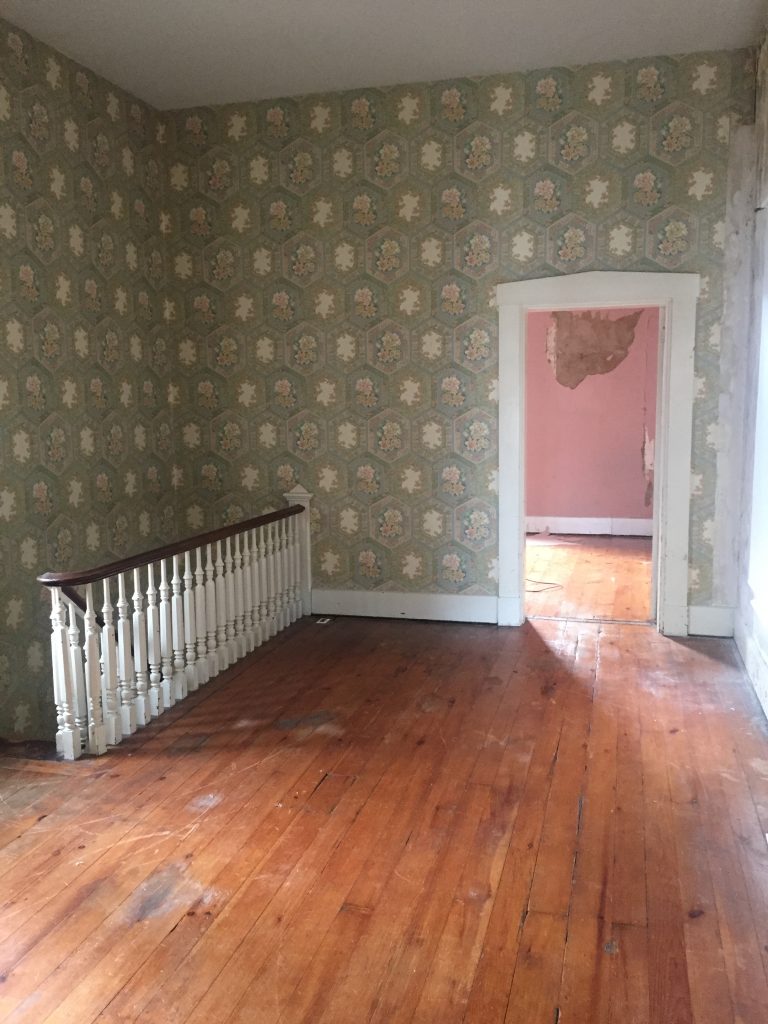
Dining Room Transformation to Date

Fireplace wall – before 
Wallpaper stripped, bonding agent applied 
Finish paint, awaiting floor refinishing & new door

Stairway wall – before 
Wallpaper stripped, bonding agent applied 
Finish paint, awaiting floor refinishing and new door
Kitchen Transformation to Date

Kitchen east wall – before 
Caninets removed, new drywall 
Brick exposed, new poplar floor, finish paint – awaiting floor finishing & cabinets 
Kitchen west wall – before 
Brick exposed (mudroom & bath addition beyond)
New Addition to Date. The old existing shed was demolished and a new one story brick addition was added to the rear of the house. It contains a rear entry “mudroom”, coat closet and powder room.

Rear shed – before 
Additon breezeway entrance 
Addition, view from breezeway – 1/2 bath left, kitchen right 
Addition alley view
Master Bedroom, Bath & Closet Transformation to Date

Master Bedrrom – before. Closet left, bath right 
Closet – before 
Bath – before

Wallpaper removing, closet/bath framing 
Closet/bath wall insulation 
Closet drywalled

Bath floor leveled 
Closet floor tiled, window trimmed 
Finish paint, awating floor refinishing
Upstairs Den Transformation to Date
Upsatirs den – before 
Zinc box “plumbing chase” for master bath 
Wallpaper removed

Bonding agent applied 
Finish paint, awaiting floor refinishing 
Finish paint, awaiting floor refinishing
Guest Room, Bath & Laundry Transformation to Date

Guest room – before – closet left, bath right 
Bath – before 
Wallpaper removed, bath framing 
Bath wall insulation

Bath window, bonding agent applied to walls 
Bath/laundry wall leveled 
Floor tiled, shower pan built 
Finish paint, awaiting floor refinishing
The New Garage & Breezeway Addition Transformation to Date. We were lucky to have a side yard that could accommodate a garage with a connecting breezeway. Ken did a great job with design concept, and the selected handmade brick blended beautifully with the house brick.

Brick delivered for garage 
Slab poured, materials deliverd 
Framing completed

Roofing completed 
Brick work begun

Thanks for taking a look at our 1876 Fixer Upper progress report!


Love all your progress reports. Congratulations on a beautiful new home! I hope to see it in person someday. xo
Thanks, Nicole. It would be great to have you visit!!
wow. Such patience and attention to detail.
Thanks, Nanci! #laboroflove
It looks great, so fun to follow your progress. It’s wonderful to see a historic house done the right way. I can’t wait to see the kitchen finished! Thanks for sharing.
Thanks, Sarah. I’m DYING to see the finished kitchen. I know I’m going to love it.